Fixing Felt Roof Shingles
A guide to fixing felt roof shingles
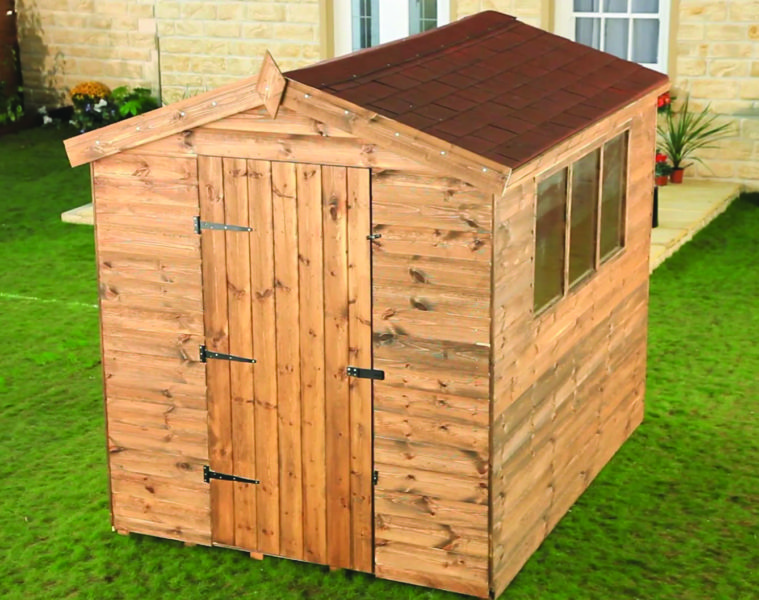
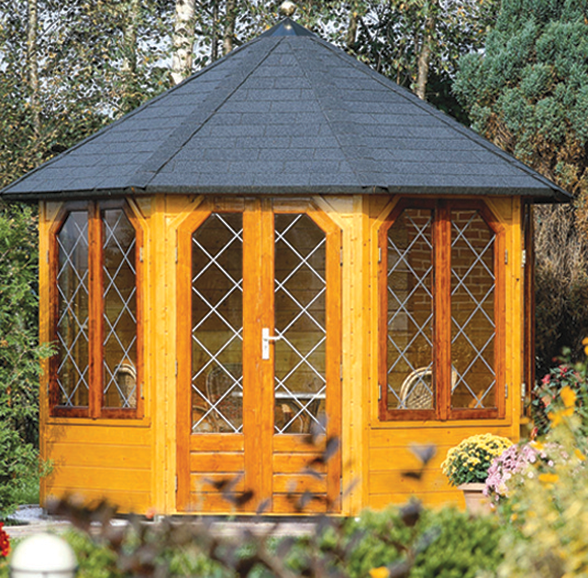
Shingle installation on a small roof is a straightforward process that even inexperienced DIYers can tackle. Suitable for pitches ranging from 15º to vertical, felt shingles are the perfect covering to provide long lasting weather protection for your garden shed, summer house, or canopy for a new hot tub.

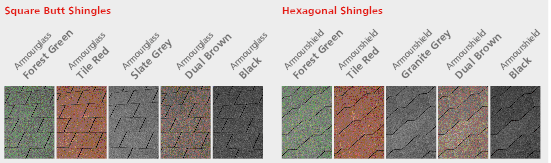
Our felt shingles are available in hexagonal or square butt shape, and in a range of colours: please choose between black, brown, green, slate and red colours, to suit different projects.
Fix your felt shingles into place quickly and efficiently using the correct tools. We’ve everything necessary to create the perfect shingle roof on our website.
You’ll need the following items to complete the job:
- a tape measure
- spirit level
- sharp knife
- straight edge
- small pressure roller
- sealant gun
- soft headed broom
- hammer
- saw
Once you’ve measured your roof, quantifying how many shingles you’ll require couldn’t be easier. They’re sold in packs which cover either 2 or 3m², along with the 20mm large head galvanised clout nails you will require and felt adhesive.
While simple to install, a nail too high up the shingle or an incorrect overhang are a couple of the common installation mistakes that will potentially reduce the lifespan of your new roof.
Read on for how to create the perfect roof...
Getting started – Prepare the surface
- Shingles can be laid over existing roofing felt, but the surface must be both flat and in good condition to avoid imperfections in your finished roof. If in doubt, we recommend you strip it back to the oriented strand board (OSB).
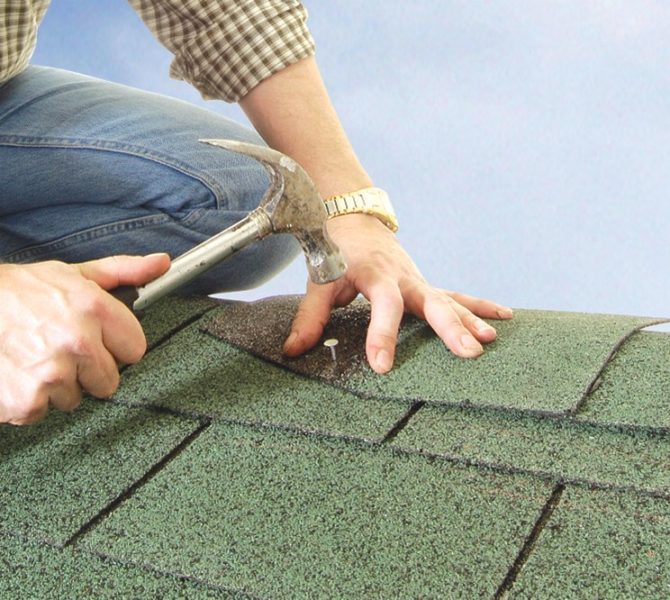
- Always ensure you don’t over hit the clout nails, the head of the nail should be flush with the tile.
- Underlay such as 3B, but should be applied to low-sloped roofs, specific high-water risk areas of habitable buildings or in particularly exposed locations.
Start with the Eaves/Verges/ Valley detailing sections
- Cut lengths of bitumen roof shingle strip from the roll (maximum 1m long), cutting sufficient lengths to run the length of the eaves.
- Each length of roof shingle strip needs to be overlapped. Repeat the application of the shingle strip for the full length of the eaves and verges. The roof shingle strip must run past each end of the eaves. Nail the overlap onto the roof with large headed galvanised clout nails at 150mm centres.
- To create a neat drip finish to the sloping verges, start at the bottom of the slope and repeat the above process up the sloping verges. Finish the detail between eaves drip and verge drip by cutting the eaves strip and overlapping the verge drip.
- Where you have a valley, manufacturers recommend that it is first lined with a layer of bitumen roof shingle underlay, which is nailed into position. Individual tabs cut from the shingle are used to form the valley. These are nailed at the top edge and overlapped by successive tabs. The lower edges of the tabs should be sealed. (As a guide, a 18 cm wide strip should be visible in the valley once complete.)
Tip: Apply felt adhesive in a zig-zag pattern.
Moving on to the main pitches
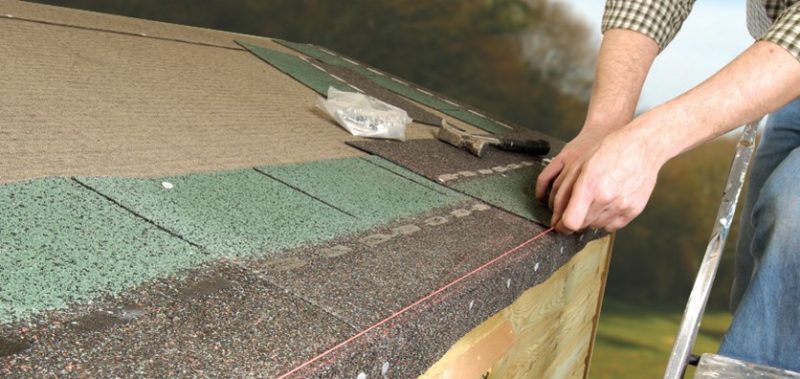
- When you’re ready to do the sloping sections, start at the eaves. Ensure the first shingle is flush with the verge edge of the roof. The bottom of the tabs must be flush with the edge of the eaves. Nail the shingle 10-15mm in from the edge. Nail above each slot between tabs 10-15mm above the end of the slot. Butt the next bitumen roof shingle to the first locating the tongue and groove. Allow a 1-2mm gap between each. Add a bead of bitumen sealant below each tab. Press the tab down firmly.
- Make sure your work is straight by measuring the gauge or overlap at each end of the roof and marking with a chalk line, before attaching the second row of shingles. The first shingle on the second row should be offset from the first row by half a tab.
- Trim the overlap at the roof edge and finish the last row at the ridge, and trim excess material flush with the edge.
Tip: Be careful not to apply too much sealant too close to the edges of the tab, to avoid excess being squeezed out. And don’t drip your sealant onto the finished work!
And finally the Hip & Ridge detailing sections
The hip and ridge shingles are applied starting at the bottom and working up the slope. Nail them into position ensuring the centre line of the tab is in line with the hip/ridge line. Subsequent shingles should be over-lapping and tabs secured with the sealant.
Tip: In cold weather, to bend the shingle it helps to gently warm the material with an electric paint stripper or similar. Do not use open flames.