How To Install Fixed-Gauge Clay Tiles
Installing fixed-gauge clay tiles does not have to be difficult. The process of setting out is not so different from fitting variable gauge tiles; even with variable-gauge tiles you still need to determine the number of courses from eaves to ridge to ensure an even gauge.
The term ‘fixed-gauge’ is used loosely, as there is a very small degree of adjustment in Imerys tile headlaps. Before work commences, the batch of tiles on site should be firstly checked to determine their actual gauge and any possible adjustment; remember that clay tiles are subject to small variations in sizes due to the drying and firing processes.
Just lay a few out on the ground or scaffold; for example, lay 10 tiles and set them to their minimum gauge and take a measurement. Then, set the tiles to their maximum gauge and take this measurement.
 Rather than installing the tile battens at the maximum or minimum tile gauge, I thoroughly recommend that they are fixed at the mid-way gauge; i.e. so that the tiles’ interlocks are set at mid-shunt (see illustration).
This will ensure that the tiles will always sit properly, even allowing for slight variations in tile size and batten gauge.
Setting out from eaves to ridge
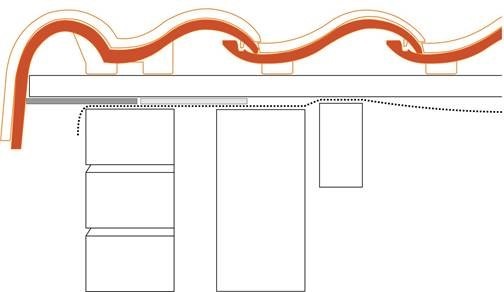
Firstly, set the position of the eaves course batten so that the tails of the first course tiles finish 45 to 50 mm over the gutter. The top tiling batten at the ridge should be set so that the ridge tiles will cover the top course tiles by at least 75mm.
The distance between the eaves and top battens can then be measured. This distance is divided by the gauge of the tiles to determine the number of courses. Of course, it is likely that this will produce a gauge at which the tiles cannot be laid.
Depending on how close the measured gauge is to the recommended gauge of the tiles, it may be possible to slightly adjust the positions of the eaves and top course battens, keeping in mind the recommended overhang of the tiles at eaves and the minimum headlap of the ridge tiles over the top course tiles.
Having said above that, it is best to set the tiles at their mid-shunt gauge, if a roofer feels confident that the gauge can be adjusted slightly, without the risk of impinging on the maximum or minimum shunt of the tile headlap, then this may help to set out to full courses.
 If in doubt, though, always set the courses at the tiles’ mid-shunt headlap and if a cut course is required, it is better, aesthetically, to cut the top course tiles.
Cut off the top section of tile and then re-drill a nail hole. It may be necessary to fix a double height top tile batten to set the angle of the top tiles at the same pitch as the tiles below, as shown in the illustration.
Tip: Imerys clay tiles are extremely hard, so an alternative method to drilling nail holes is to cut a diagonal notch from the top of the tile, such that a nail can be driven into the top batten through the notch.
Setting out across the roof
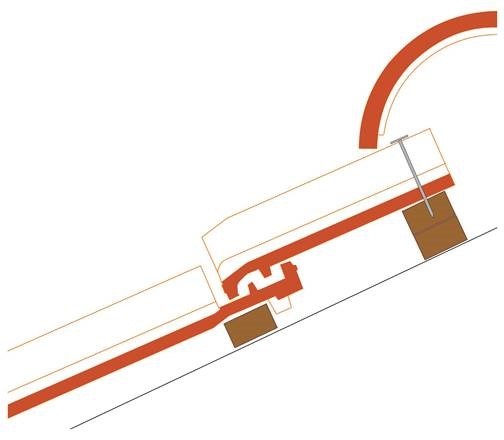
Careful setting out across the roof will ensure the tile overhang is even at each end of the roof. Tiles that are laid ‘cross-bonded’, such as the Beauvoise and Graphite, have tile-and-half tiles and half tiles to aid setting out. Cloaked verge tiles are available in half tile and tile widths, so the roofer can choose whichever works out best to start and end with to achieve the correct overhang at gable walls.
The Imerys Double Panne S tile is very cleverly compatible with the Single Panne S, meaning that the roofer can choose to start with either a double or single width tile or to fit a single width tile adjacent to the left-hand verge double roll tile to aid setting out. Similarly, when using cloaked verge tiles with Double Panne S, a Single Panne S tile can be introduced adjacent to the cloaked verge to assist with coursing.
 The ideal position is to set the cloaked verge tiles close to the gable wall or bargeboard.
However, if this not possible, any resulting gap of more than 15mm wide can be closed by installing fibre cement boards under the tile batten ends, as shown in the illustration. Make sure any gap is distributed evenly between both ends of the roof.
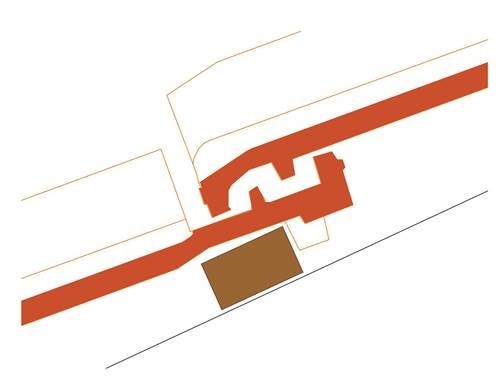
Cutting at hips and valleys
The fact that Imerys make tile-and-half tiles for their flat interlocking tiles is a great aid for cutting into hips and valleys by ensuring that the cut pieces are large enough to mechanically fix. Similarly, when using the Panne S tile, Double Panne S tiles can be used for cutting into the hip and valley, thus ensuring the cut tiles are as large as possible, particularly at low roof pitches.
 John Mercer: May 2019